Self-Hosting n8n – Your Automation Sidekick (with a Dash of AI)


In this post, I’ll walk you through how to fully self-host the n8n automation platform — from buying a domain and renting a VPS, to deploying it with Docker. Whether you're building workflows, scraping data, or experimenting with AI agents, n8n is flexible, extendable, and best of all — yours to control.
This guide is long, but contains all the necessary details.
docs.n8n.io/hosting/installation/server-setups/docker-compose
We’re all feeling the AI-everywhere moment — from indie hackers to enterprises, everyone is “AI-washing” their workflows, products, and even job titles.
There’s this ongoing fear that AI will soon replace programmers, but let’s be honest: the truth, as always, lies somewhere in the middle.
Will AI assist us? Absolutely.
Will it replace developers entirely? Not anytime soon.
That’s where tools like n8n come in. While it’s not entirely (although a big portion is😊) branded as an "AI tool", because of its ability to integrate with LLMs and even build autonomous AI agents, it's riding the wave and helping automate tasks that previously required code or manual effort.
What You’ll Learn
By the end of this guide, you’ll know how to:
- Set up a secure VPS (Virtual Private Server)
- Purchase and configure a custom domain
- Deploy and run n8n with Docker
- Build your own private, extensible automation system — no subscription required
Here are the sections for quick reference:
n8n recommends self-hosting only for experienced users. Mistakes can lead to data loss, security issues, or downtime. If you're unsure, try n8n Cloud instead.
That said — if you're comfortable with a bit of Linux, Docker, and DNS configuration, or you're curious and ready to learn — this guide is for you.
🗄️Set up a secure VPS
For using a VPS I recommend also purchasing a VPS from any of cloud providers. My choice (again unaffiliated) is Hetzner.
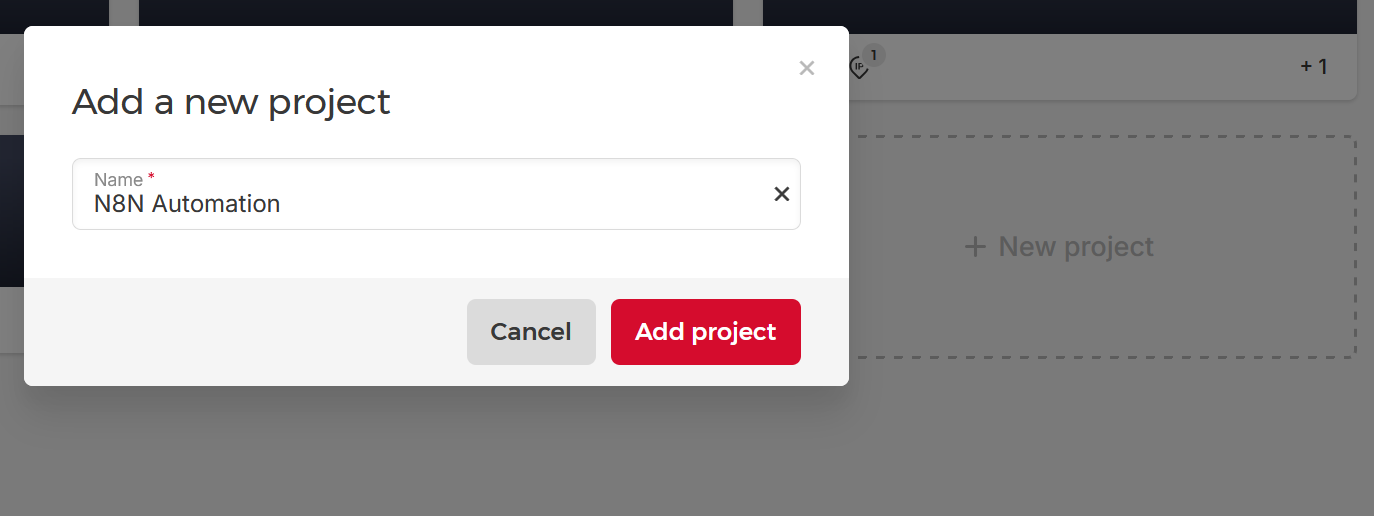
Click a new project on their cloud console dashboard and name project to your liking (ex. N8N Automation).
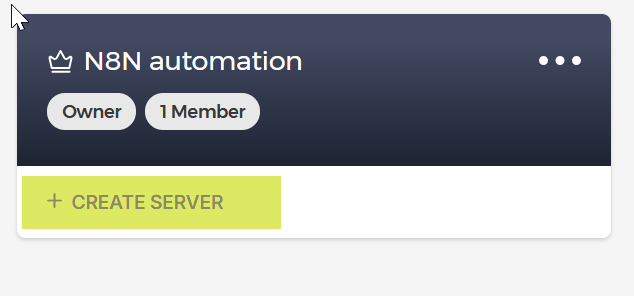
And after that click “+Create server”
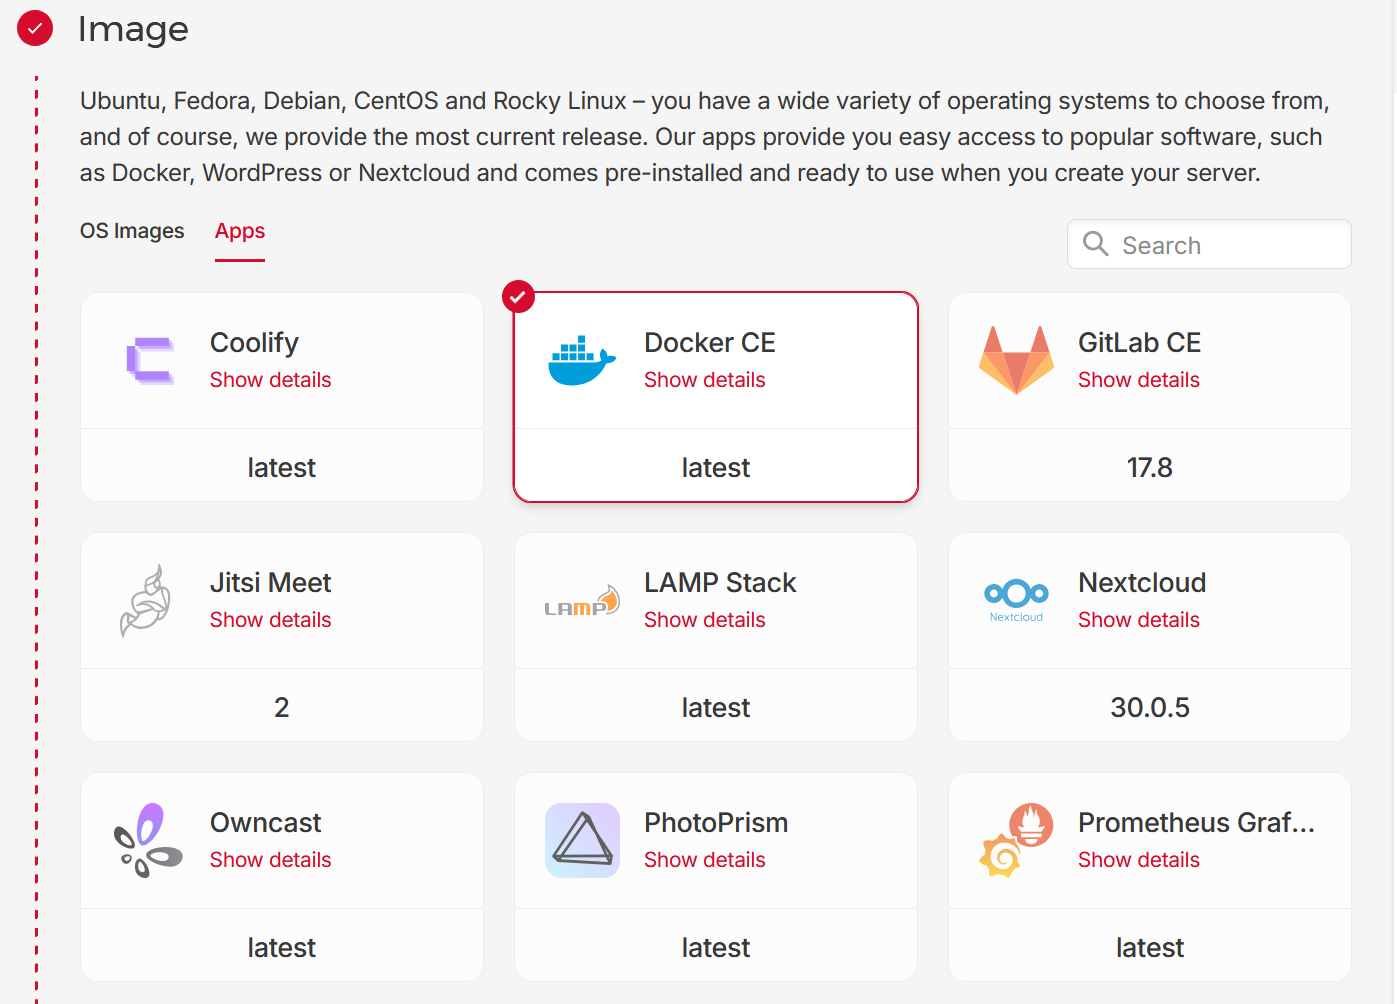
Chose the location closest to your location and in Image section click on “Apps” and choose “Docker CE”. This will install Ubuntu 24.04 together with Docker.
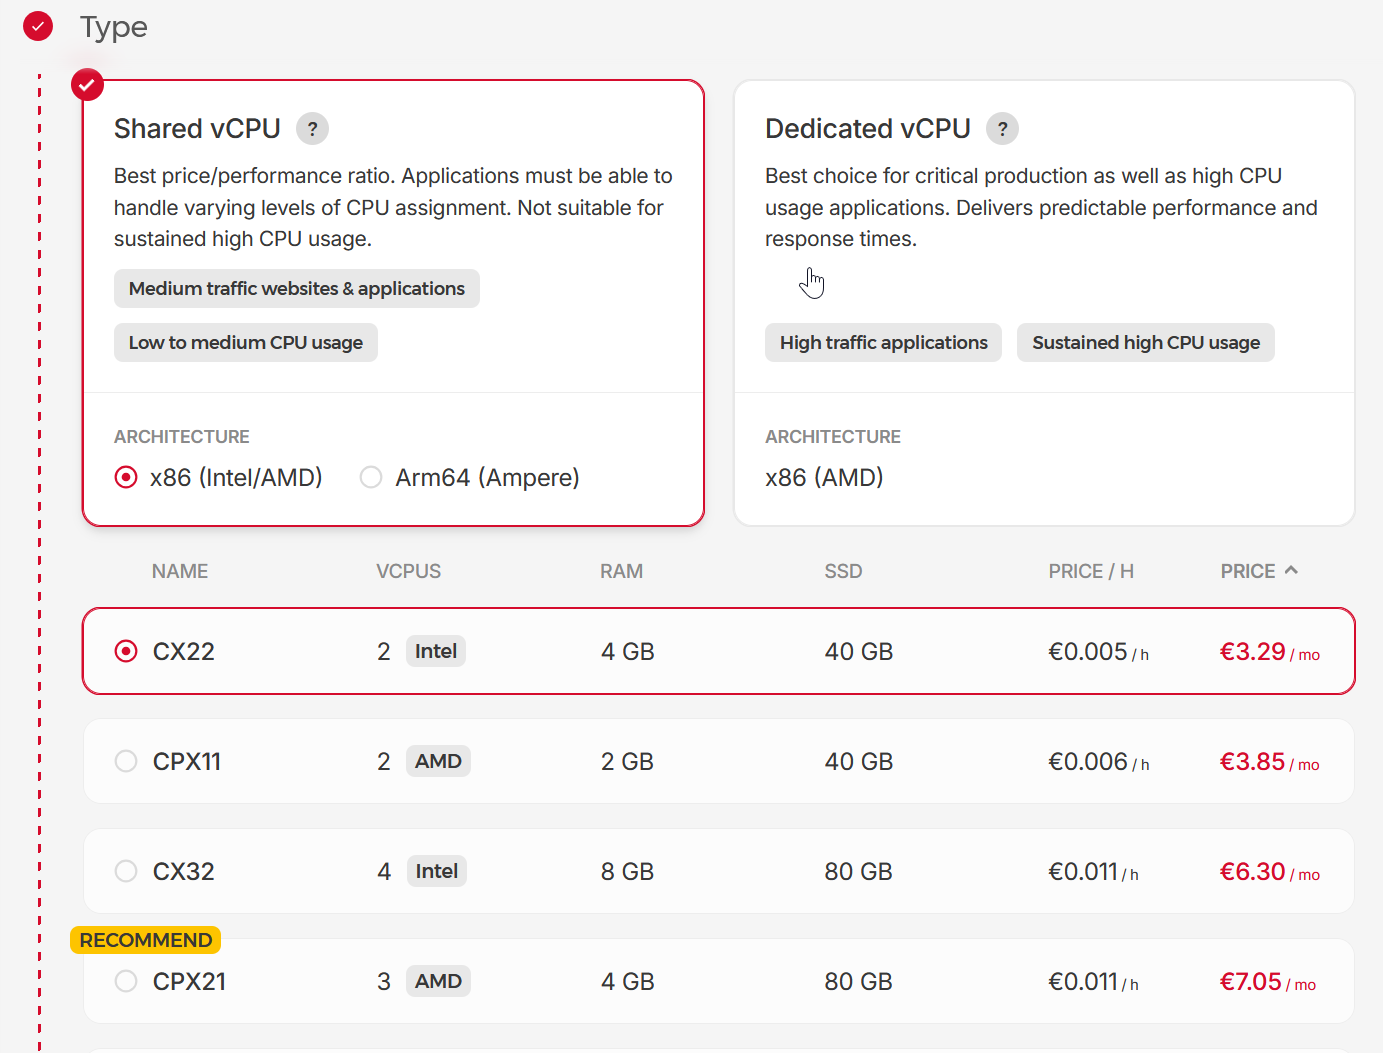
Next, for the Type of the VPS we will choose “Shared vCPU” and based on our app selection Hetzner recommends CPX21 which is a machine with 3 VCPUS 4GB of RAM and 80GB of SSD storage, that will cost you €7.05 /month.
If you check prerequisites on n8n documentation, it states that n8n is not CPU intensive,so this should be more than enough, though the disclaimer is that it varies depending on number of users, workflows and executions.
So since this is the case, and the fact you can rescale (scale up - bump up CPU and RAM) on Hetzner’s VPS, we will actually choose CX22 with 2VCPUS 4GB of RAM and 40GB SSD storage, that will cost you only €3.29/month.
Next, in the Networking section you can leave default selection of IPv4 and IPv6. (Note: having public IP costs €0.5/month)
🔐SSH Keys — Securing Access to Your VPS
This is an important step — your VPS will have a public IP, which means it's directly exposed to the internet. Even if you're just setting up a hobby project, you should always secure access properly. The best practice is to use SSH key authentication instead of passwords.
We'll start by generating a new SSH key:
ssh-keygen -t ed25519 -C "n8n-selfhost"You’ll be prompted to:
- Choose where to save the key (press
Enterto use the default:~/.ssh/id_ed25519) - Set a passphrase (optional but recommended)
Example output of ssh-keygen :
bojana@7OfNine:~$ ssh-keygen -t ed25519 -C "n8n-selfhost"
Generating public/private ed25519 key pair.
Enter file in which to save the key (/home/bojana/.ssh/id_ed25519):
Enter passphrase (empty for no passphrase):
Enter same passphrase again:
Your identification has been saved in /home/bojana/.ssh/id_ed25519
Your public key has been saved in /home/bojana/.ssh/id_ed25519.pub
The key fingerprint is:
SHA256:UujX91QnAsb1rrVAAMSS07KbgUxa3GI39zGIYB2OoRQ n8n-selfhost
The key's randomart image is:
+--[ED25519 256]--+
|  Eo++.Bo++..    |
| . o*+@.=.+o .   |
|  .*.+oB.. oo o o|
|  . o.o. ... o o.|
|      o+S . o +  |
|      oo   . * . |
|            . o  |
|                 |
|                 |
+----[SHA256]-----+
Now do:
bojana@7OfNine:~$ cat ~/.ssh/id_ed25519.pub
ssh-ed25519 AAAAC3NzaC1lZDI1NTE5AAAAIC4w30a+sB56njYFmueuHIs2WMxhqaFTruSjb9coSayT n8n-selfhost
And copy the output of the public key to the Hetzner’s form in SSH keys section:

And click “Add SSH key”
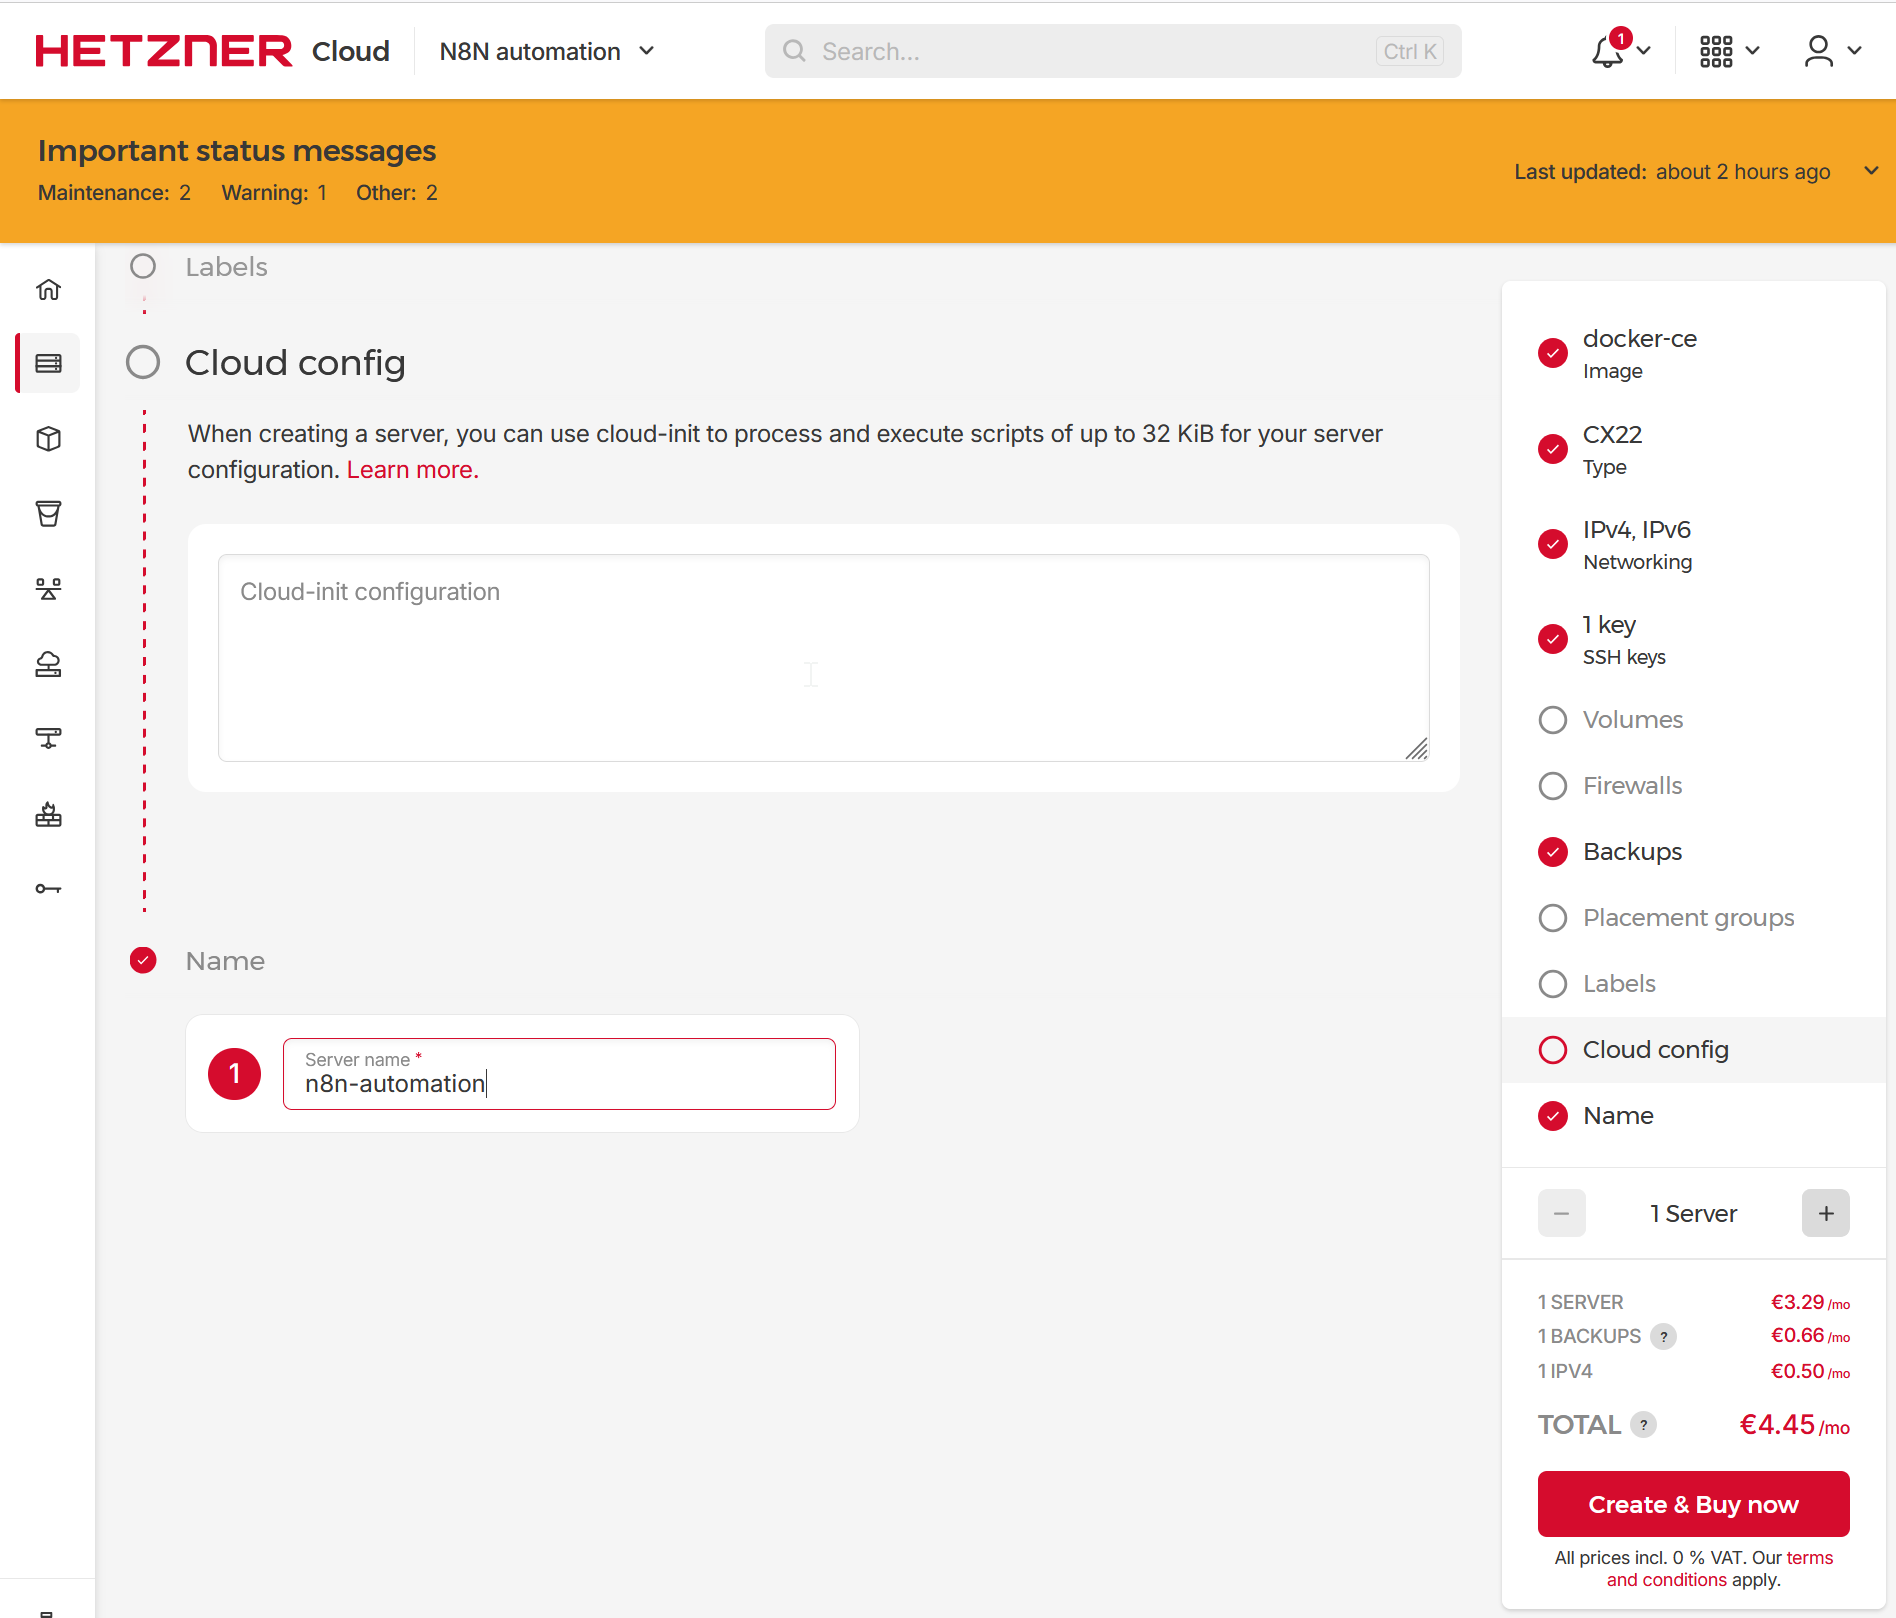
Next, we have option to attach volumes (additional storage), create firewalls (we will use ufw on the VPS itself for this) and/or use backups. Depending of seriousness of this project, you can choose to or not this option, it’s €0.66/month and it will create a copies of your server’s disk every day.
Finally, we can give this server a name, choose whatever will be helpful to you and hit “Create & Buy now” and wait until VPS is provisioned.
Once the VPS is provisioned, copy the Public IP assigned to it and do:
#:~$ ssh root@<VPS-Public-IP>If everything went well you should be prompted with similar message as bellow, and asked to provide passphrase for a key if you created one after which you should be logged into your Ubuntu 24.04 instance!
The authenticity of host '<VPS-Public-IP>' can't be established.
ECDSA key fingerprint is SHA256:EHJB0s61tt4WcsuGPkhTRIn6CjuLz0lGOItY3mkT/dA.
Are you sure you want to continue connecting (yes/no/[fingerprint])? yes
Warning: Permanently added '<VPS-Public-IP>' (ECDSA) to the list of known hosts.
Enter passphrase for key '/home/bojana/.ssh/id_ed25519':
Welcome to Ubuntu 24.04.1 LTS (GNU/Linux 6.8.0-52-generic x86_64)

 * Documentation:  https://help.ubuntu.com
 * Management:     https://landscape.canonical.com
 * Support:        https://ubuntu.com/pro

 System information as of Fri Jun 13 12:16:15 PM UTC 2025

  System load:  0.05              Processes:             129
  Usage of /:   4.3% of 37.23GB   Users logged in:       0
  Memory usage: 6%                IPv4 address for eth0: 91.99.136.92
  Swap usage:   0%                IPv6 address for eth0: 2a01:4f8:1c1a:3f29::1


Expanded Security Maintenance for Applications is not enabled.

0 updates can be applied immediately.

Enable ESM Apps to receive additional future security updates.
See https://ubuntu.com/esm or run: sudo pro status


The list of available updates is more than a week old.
To check for new updates run: sudo apt update

root@n8n-automation:~#
Let’s verify docker and docker compose are there:
root@n8n-automation:~# docker -v
Docker version 27.5.1, build 9f9e405
root@n8n-automation:~# docker compose version
Docker Compose version v2.32.4
Before proceeding with n8n installation let’s take a few steps related to mentioned security and ssh access. We already connected using generated ssh key which is great, although connecting/sshing with root user is not recommended.
Let’s create non-root user with sudo privileges:
root@n8n-automation:~# adduser bojanaAnd add user to the sudo group:
root@n8n-automation:~# usermod -aG sudo bojanaNow, try logging in with newly created user:
bojana@7OfNine:~$ ssh bojana@<VPS-Public-IP>We also want to allow login as the new user (with only the key):
rsync --archive --chown=username:username ~/.ssh /home/usernameNow, to prevent root login and enforce key-only auth:
nano /etc/ssh/sshd_configAnd ensure these lines are set:
PermitRootLogin prohibit-password
PubkeyAuthentication yes
Then restart the ssh service:
systemctl restart ssh🌐Purchasing domain
If you already own a domain, you don't have to purchase a new one. We can create a subdomain and use that when configuring n8n. If you don't own one, you can purchase one from domain registers such as:
- Porkbun
- Namecheap
- Hostinger
Or any other. I use porkbun for most of my projects, and haven't had any issues so far. I recommend either .dev or .cloud or even .xyz as they will cost you anywhere between 2$ and 8$ for a year. (Note: they usually renew and at bit higher prices so pay attention)
When you purchased a domain, and created account, say on Porkbun, you will want to go to their “domain management” dashboard and find your domain.
After that you select "DNS” which will take you to the page where you are able to manage DNS records for the domain. We simply need to insert an A record for our subdomain.
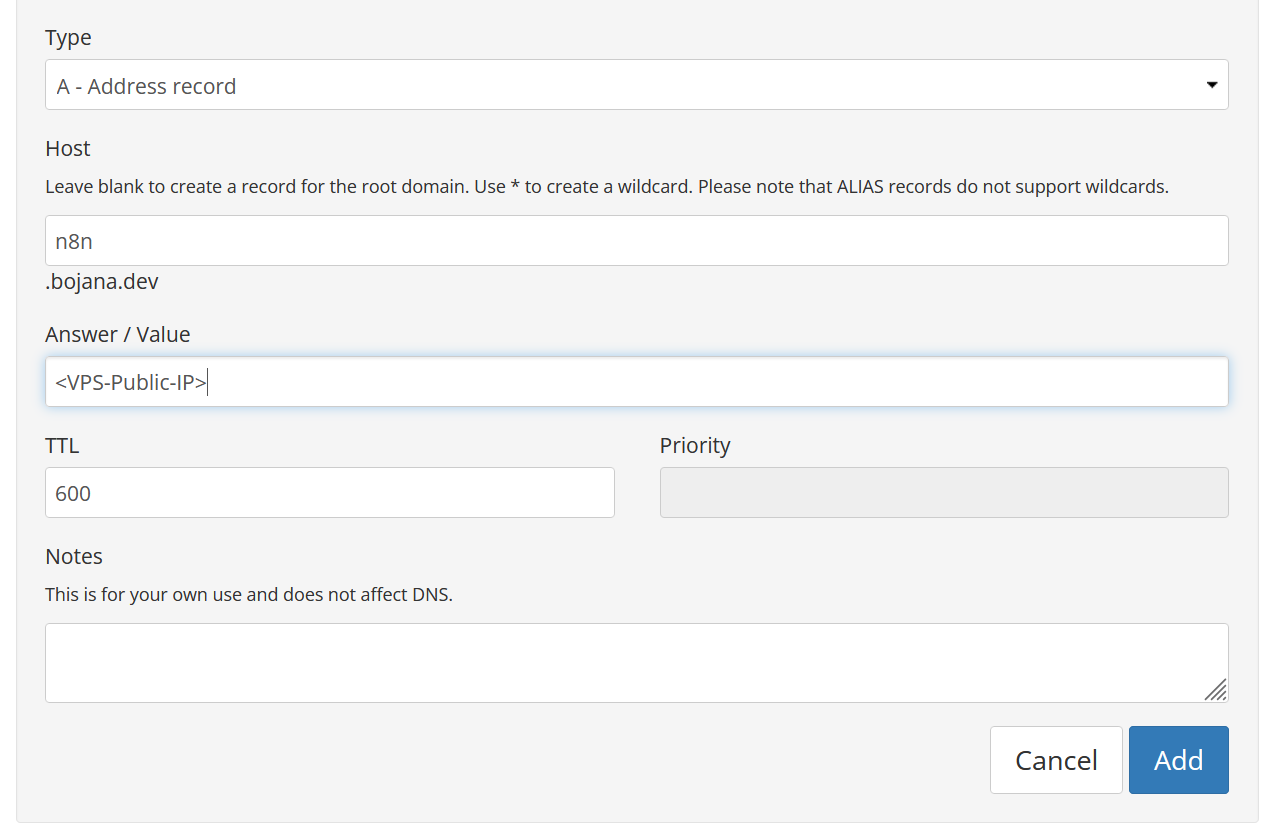
Click add and that's it. Depending on TTL it your new subdomain should propagate rather quickly.
To verify new subdomain resolves to your VPS's IP do:
dig +short n8n.mydmomain.com🧾A Note on Licensing — n8n Isn’t Fully Open Source
While n8n offers self-hosting and provides source code access, it’s not licensed under a permissive open-source license like MIT or Apache 2.0.
Instead, it uses a Sustainable Use License (SUL) — a custom license designed to allow personal and internal use, while preventing commercial exploitation of the product itself.
This is important to understand before building a product or service around n8n.
Here’s a quick breakdown:
✅What is allowed under the SUL:
- Self-hosting n8n for personal use or inside your company/team
- Using it to automate tasks, processes, or workflows internally
- Extending or customizing n8n for your own non-commercial needs
- Embedding n8n in an internal tool used only within your organization
❌ What is not allowed under the SUL:
- Selling n8n as a service (e.g., "n8n Cloud clone" or "automation-as-a-service")
- Embedding n8n in a commercial SaaS offering
- Rebranding and reselling the platform or charging others to access your hosted version
- Offering hosted n8n to external users/customers, even if it's “free but monetized indirectly”
With this said, let's start with the first step in the guide.
🤖Installing n8n
Finally, we are at step where we want to setup the actual n8n platform.
In the previous step we verified that the docker and docker-compose are installed. We can optionally grant access to non-root user
sudo usermod -aG docker ${USER}
# Register the `docker` group memebership with current session without changing your primary group
exec sg docker newgrp
Now, you should be able to user docker commands without sudo:
bojana@n8n-automation:~$ docker ps
CONTAINER ID   IMAGE     COMMAND   CREATED   STATUS    PORTS     NAMES
Now, we want to setup some env variables required for n8n installation.
Let's create a dir with the required .env file and (later) docker-compose file:
bojana@n8n-automation:~$ mkdir n8n-compose
bojana@n8n-automation:~$ cd n8n-compose/
bojana@n8n-automation:~/n8n-compose$
Now, within this folder create an .env file and paste the contents below (with changes lines with your domain/email etc.)
bojana@n8n-automation:~/n8n-compose$ nano .env# DOMAIN_NAME and SUBDOMAIN together determine where n8n will be reachable from
# The top level domain to serve from
DOMAIN_NAME=example.com
# The subdomain to serve from
SUBDOMAIN=n8n
# The above example serve n8n at: https://n8n.example.com
# Optional timezone to set which gets used by Cron and other scheduling nodes
# New York is the default value if not set
GENERIC_TIMEZONE=Europe/Berlin
# The email address to use for the TLS/SSL certificate creation
SSL_EMAIL=user@example.comNext, n8n documentation suggest creating directory local-files for sharing files between n8n instance and the host system. These files should be created with docker compose, but this ensures proper permissions and ownership are set.
bojana@n8n-automation:~/n8n-compose$ mkdir local-files
bojana@n8n-automation:~/n8n-compose$ ls
local-files
Finally, we create a following compose.yaml file:
services:
  traefik:
    image: "traefik"
    restart: always
    command:
      - "--api.insecure=true"
      - "--providers.docker=true"
      - "--providers.docker.exposedbydefault=false"
      - "--entrypoints.web.address=:80"
      - "--entrypoints.web.http.redirections.entryPoint.to=websecure"
      - "--entrypoints.web.http.redirections.entrypoint.scheme=https"
      - "--entrypoints.websecure.address=:443"
      - "--certificatesresolvers.mytlschallenge.acme.tlschallenge=true"
      - "--certificatesresolvers.mytlschallenge.acme.email=${SSL_EMAIL}"
      - "--certificatesresolvers.mytlschallenge.acme.storage=/letsencrypt/acme.json"
    ports:
      - "80:80"
      - "443:443"
    volumes:
      - traefik_data:/letsencrypt
      - /var/run/docker.sock:/var/run/docker.sock:ro

  n8n:
    image: docker.n8n.io/n8nio/n8n
    restart: always
    ports:
      - "127.0.0.1:5678:5678"
    labels:
      - traefik.enable=true
      - traefik.http.routers.n8n.rule=Host(`${SUBDOMAIN}.${DOMAIN_NAME}`)
      - traefik.http.routers.n8n.tls=true
      - traefik.http.routers.n8n.entrypoints=web,websecure
      - traefik.http.routers.n8n.tls.certresolver=mytlschallenge
      - traefik.http.middlewares.n8n.headers.SSLRedirect=true
      - traefik.http.middlewares.n8n.headers.STSSeconds=315360000
      - traefik.http.middlewares.n8n.headers.browserXSSFilter=true
      - traefik.http.middlewares.n8n.headers.contentTypeNosniff=true
      - traefik.http.middlewares.n8n.headers.forceSTSHeader=true
      - traefik.http.middlewares.n8n.headers.SSLHost=${DOMAIN_NAME}
      - traefik.http.middlewares.n8n.headers.STSIncludeSubdomains=true
      - traefik.http.middlewares.n8n.headers.STSPreload=true
      - traefik.http.routers.n8n.middlewares=n8n@docker
    environment:
      - N8N_HOST=${SUBDOMAIN}.${DOMAIN_NAME}
      - N8N_PORT=5678
      - N8N_PROTOCOL=https
      - NODE_ENV=production
      - WEBHOOK_URL=https://${SUBDOMAIN}.${DOMAIN_NAME}/
      - GENERIC_TIMEZONE=${GENERIC_TIMEZONE}
    volumes:
      - n8n_data:/home/node/.n8n
      - ./local-files:/files

volumes:
  n8n_data:
  traefik_data:
As stated in the docs, this creates two containers:
- n8n (actual n8n app)
- traefik (application proxy to manage TLS/SSL certificates and manage routing)
It also creates two docker volumes (n8n_data, traefik_data) and mounts the local-files directory we created earlier.
Finally, we run the docker-compose to bootstrap everything:
bojana@n8n-automation:~/n8n-compose$ sudo docker compose up -dAfter this, you should see 2 running above mentioned containers:
bojana@n8n-automation:~/n8n-compose$ docker ps
CONTAINER ID   IMAGE                     COMMAND                  CREATED          STATUS          PORTS                                                                      NAMES
77f28a4f1e8f   docker.n8n.io/n8nio/n8n   "tini -- /docker-ent…"   14 seconds ago   Up 13 seconds   127.0.0.1:5678->5678/tcp                                                   n8n-compose-n8n-1
762beb6046f5   traefik                   "/entrypoint.sh --ap…"   14 seconds ago   Up 13 seconds   0.0.0.0:80->80/tcp, :::80->80/tcp, 0.0.0.0:443->443/tcp, :::443->443/tcp   n8n-compose-traefik-1
If everything went well and you see running containers check your configured subdomain (n8n.mydomain.com)
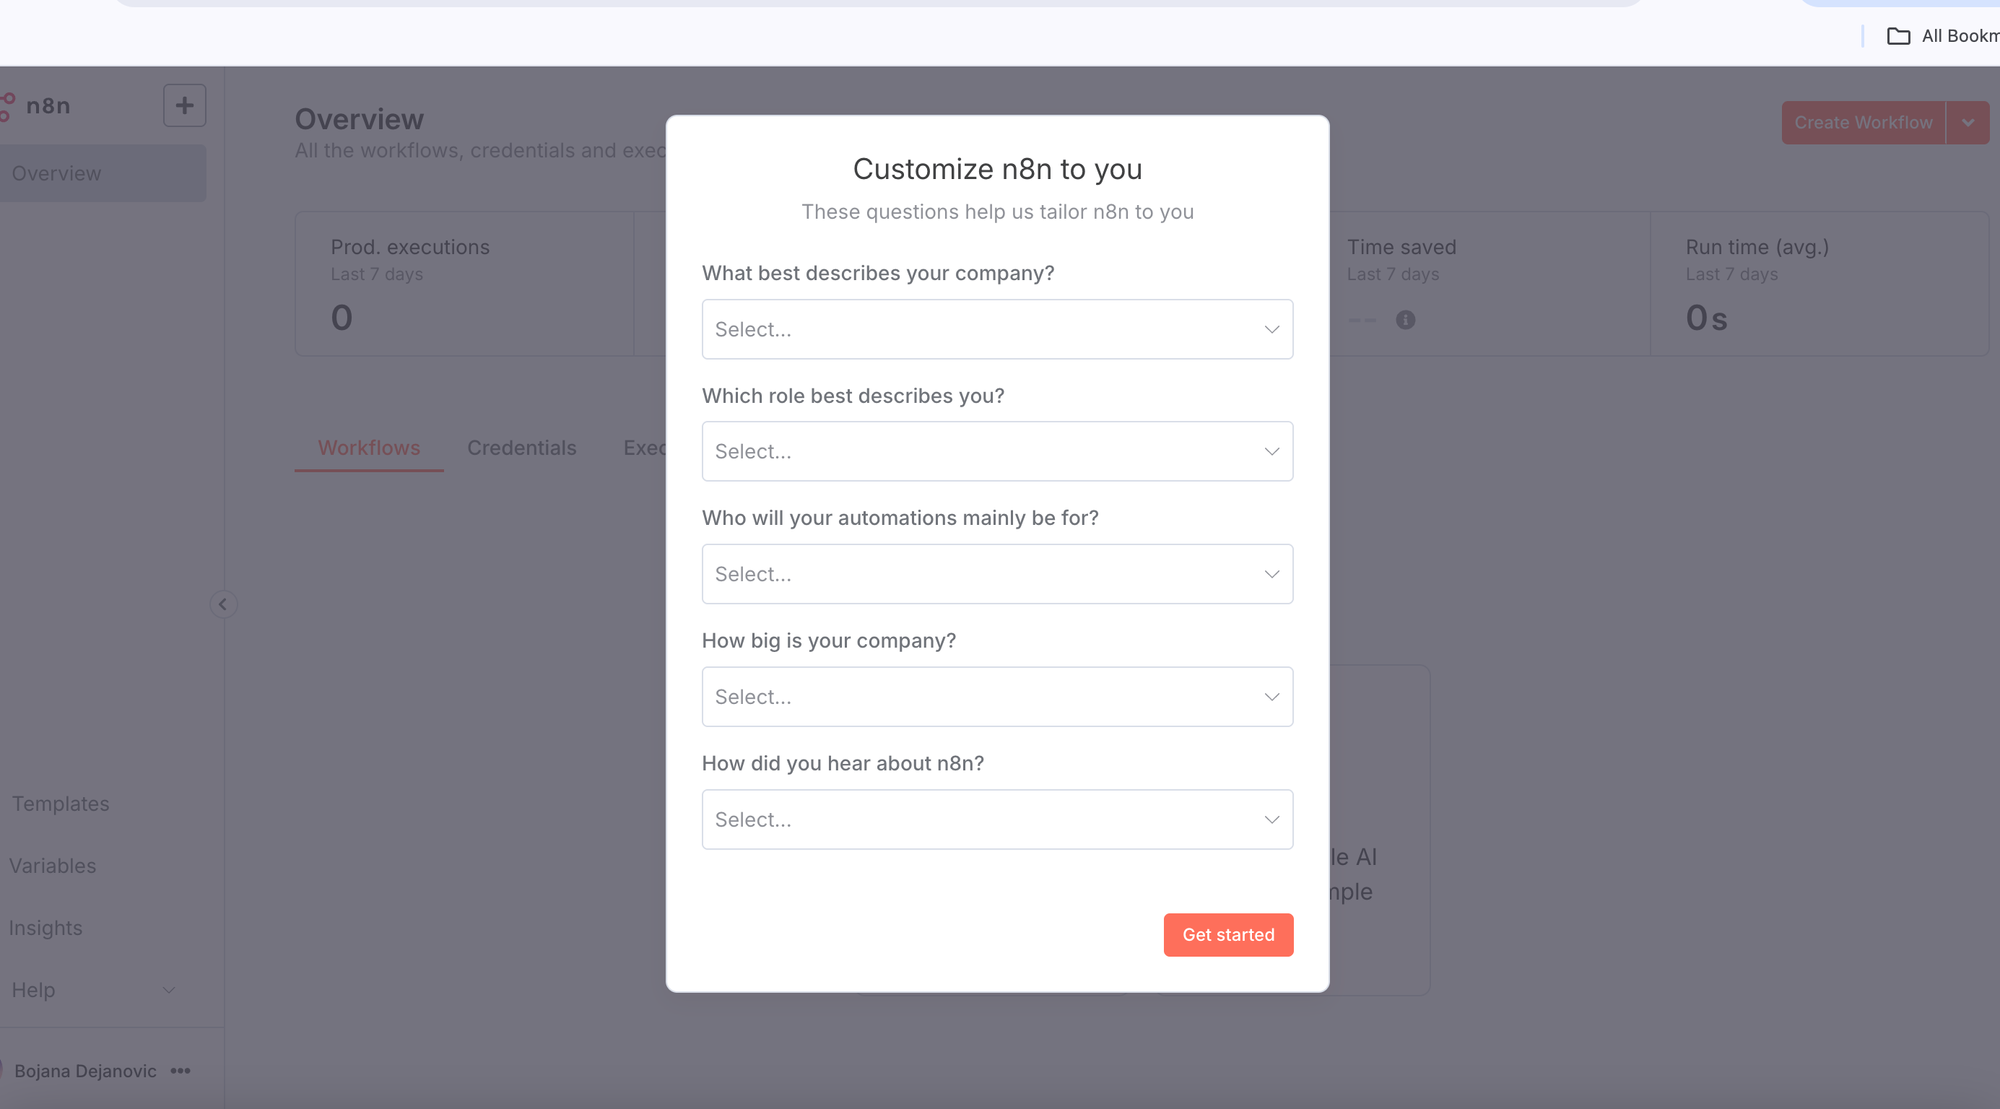
You should see n8n setup screen like below:

Fill up the form and hit Next. And fill out the required n8n's "customization form"
Next you can skip or register with email for some additional features on Community Edition such as folders, debug in editor, custom execution data etc.
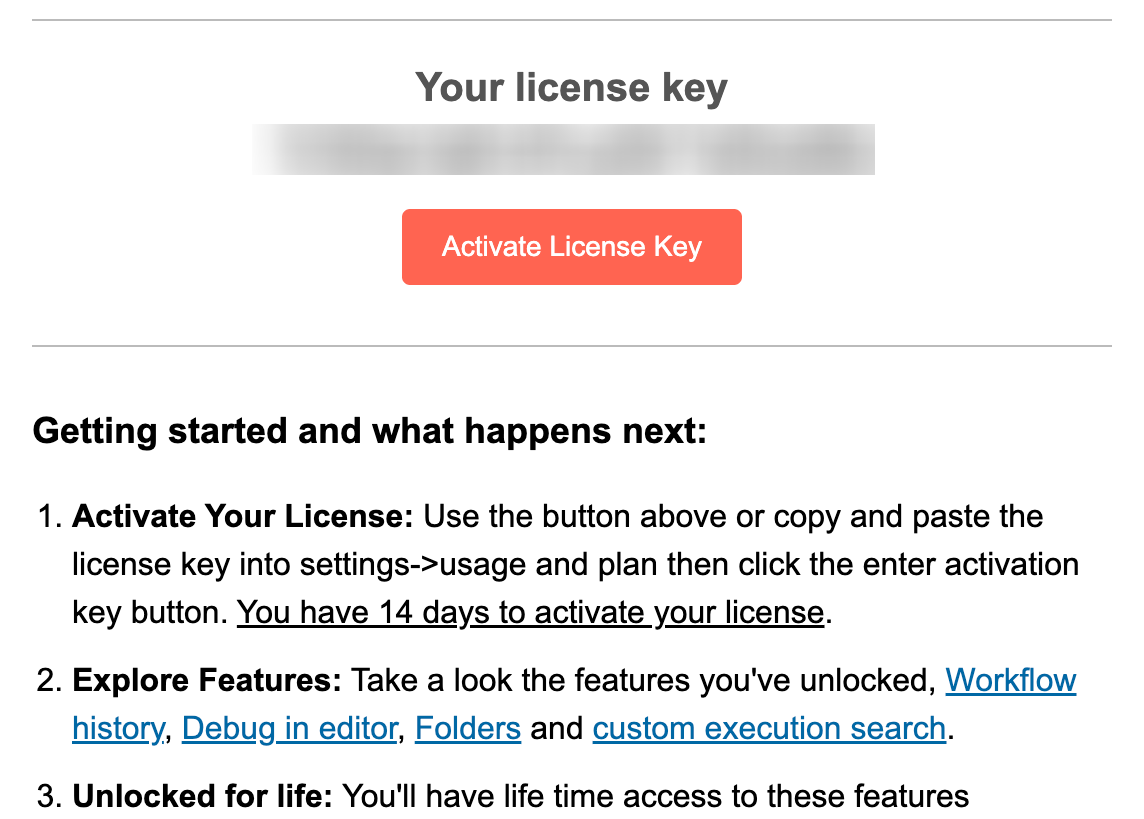
If you register, you should receive an activation code on your email address:
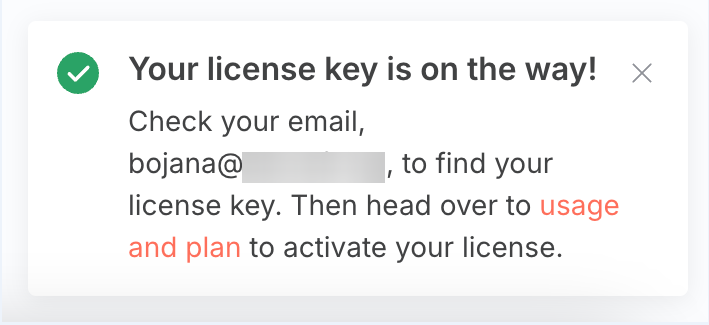
After this you should receive your license with activation code on registered email, just click Activate License Key in the email and that's it.
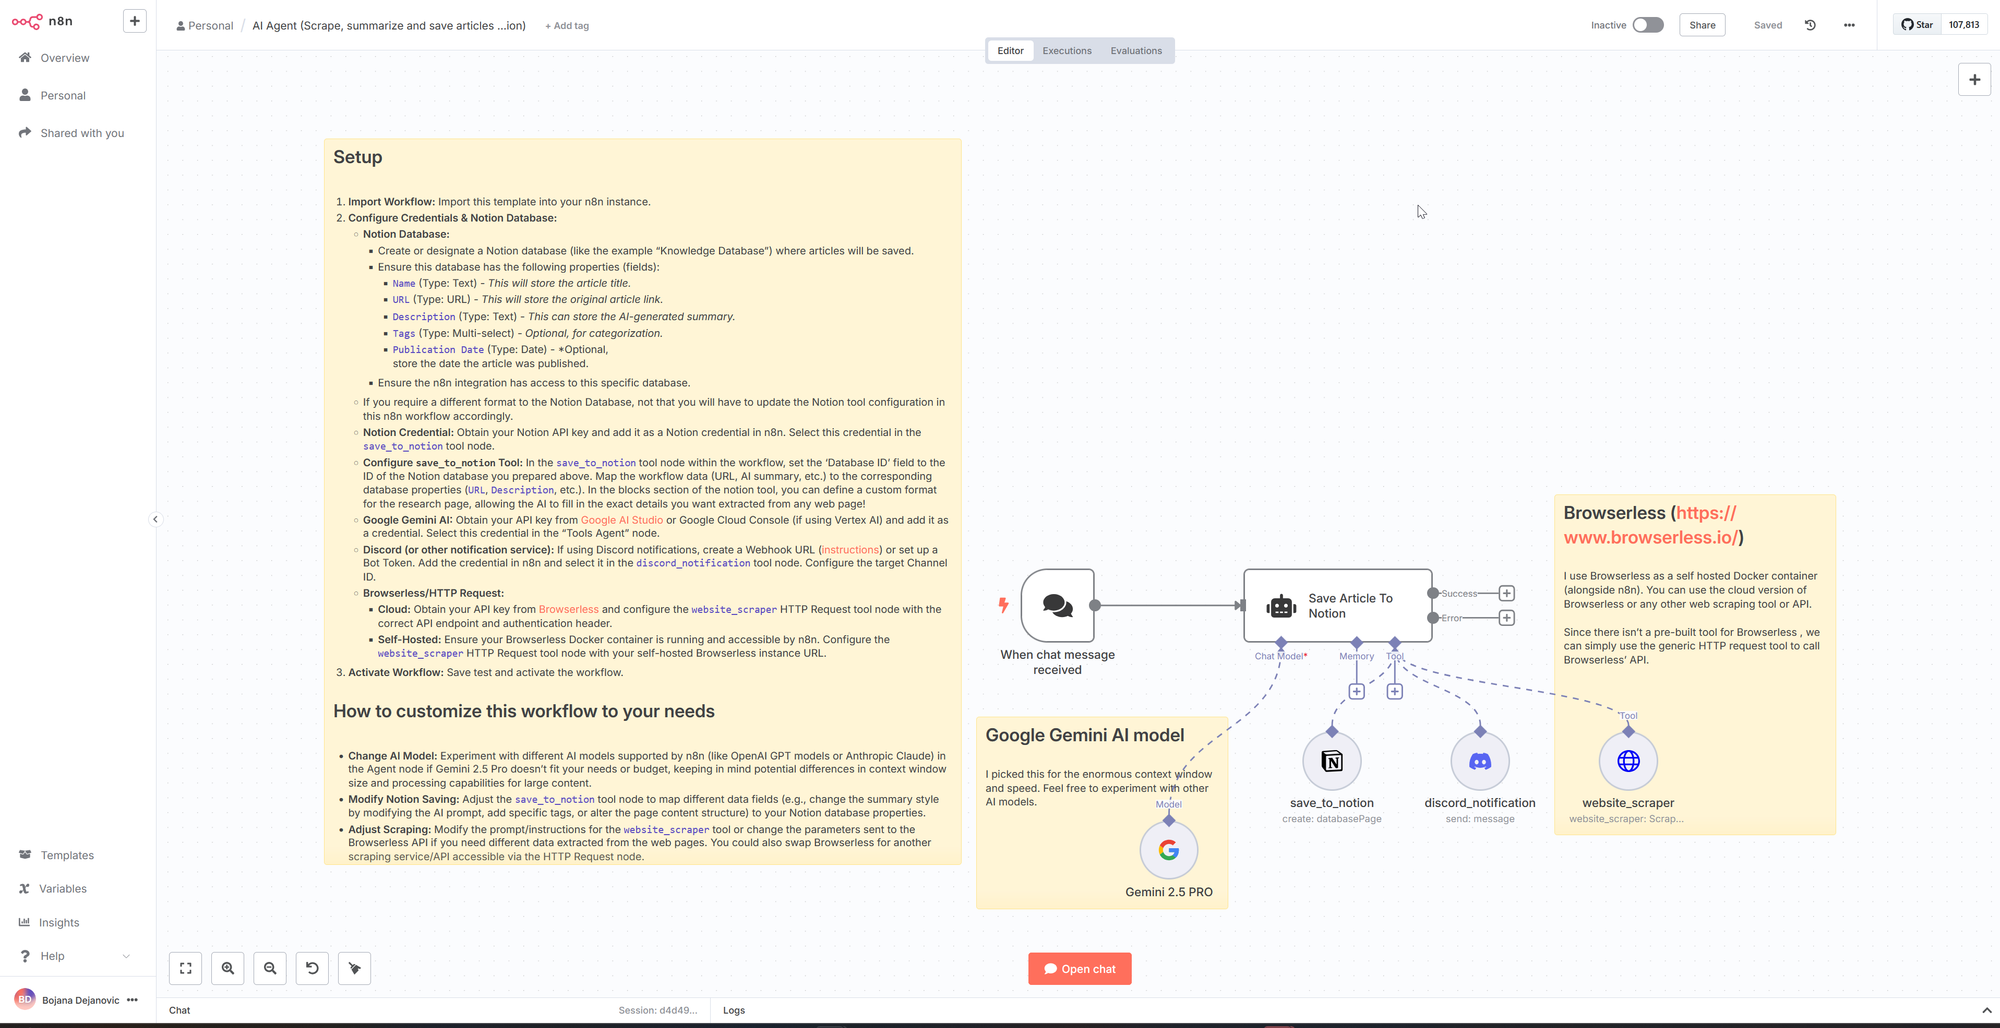
And this is it, you should be able to create and edit workflows, create AI agents etc.
📋Wrapping Up
If you've made it this far and everything is up and running — congratulations! You've successfully deployed and secured your own self-hosted n8n instance.
If something didn’t work along the way, I encourage you to double-check the steps — it’s easy to miss a small detail, especially when security configurations are involved. I’ve aimed to make this guide thorough, not overwhelming, because skipping over things like proper SSH setup or server hardening can leave you vulnerable, even for a hobby project.
☁️“But I could just use n8n Cloud...”
Absolutely — and that’s a valid choice.
If you’re looking for a plug-and-play experience, the n8n Cloud Starter plan is a solid option. It saves time and abstracts away the complexity.
But here's the trade-off:
- With self-hosting, you own your data — no third party in the loop
- You can tinker and extend freely, without worrying about platform limitations
- You learn valuable skills — from infrastructure to automation
In the long run, a few euros a month for a VPS and domain is a small price to pay for freedom, control, and learning.
Thanks for following along — I hope this guide helped you build something real, useful, and yours.
Cheers, and happy automating!🎉