How to self-host Bitwarden password manager


Using a password manager is a good security practice, of which I will not be talking much nor convince you to use one. Since you are reading this article, chances are you are already using one or want to try it out.
However, with the recent LastPass hack question arises whether it is safe to trust a 3rd party cloud provider to safely store all your valuable passwords. Using a password manager is a “no-brainer” for most of you us security-aware folks, but if you are also concerned about where and how they are stored as well, then this “self-hosted” option might be for you.
A "Silver bullet" solution doesn't exist. Nothing will make you 100% secure, however this way at least you will have complete control.
Bitwarden is, as they claim on their website, an integrated open-source password management solution for individuals, teams, and business organizations.
While they have plans for both personal use and business, they also have the option to self-host Bitwarden.
Self-host option of Bitwarden can be hosted on Linux, MacOS and Windows. We will be focusing on Linux hosting.
They do offer something they call “Unified Self-Host deployment” which is essentially all of the services needed for Bitwarden to run in one unified Docker container, whereas the “Standard Deployment Offer” uses 12 individual Docker containers working together. Furthermore, in the unified deployment you can choose between database providers such as Microsoft SQL Server, MySQL, and PostgreSQL, and Standard Deployment uses Microsoft SQL Server. Or if you like to look at fancy diagrams, something like the below:


The “Unified self-host” option is still in beta, so we’re gonna go with “Standard Deployment Offer”.
- Prerequisites
- Domain setup
- Docker and Docker compose
- Bitwarden user and directory
- Install Bitwarden
- Set up 2FA
Prerequisites
Before continuing with the setup, there are some prerequisites that we need to fulfill.
- Domain - we need a domain for our Bitwarden instance
- Linux host - we need a Linux machine. It could be any Linux host, but for the sake of simplicity I will provision an Ubuntu (22.04) VPS on Hetzner Cloud, but you should be good with any provider and distribution.
- As per Bitwarden documentation, there are certain requirements in terms of system specification (see the minimum and recommended resource below)
- Time and patience 😊
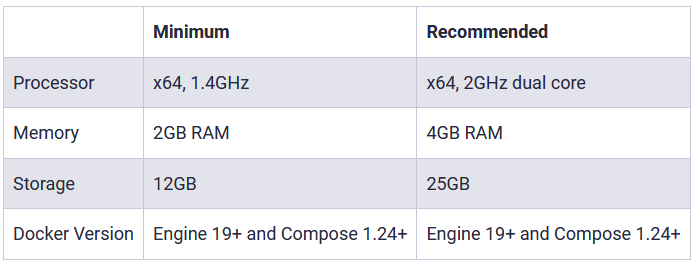
I will use recommended system resources, so a Linux VPS with 2 cores and 4GB of RAM. (Note: on mentioned provider, this cost is about 5.35€/month)
As stated above, we will also need a domain/subdomain. If you already own a domain, you can create a subdomain for bitwarden.
Domain setup
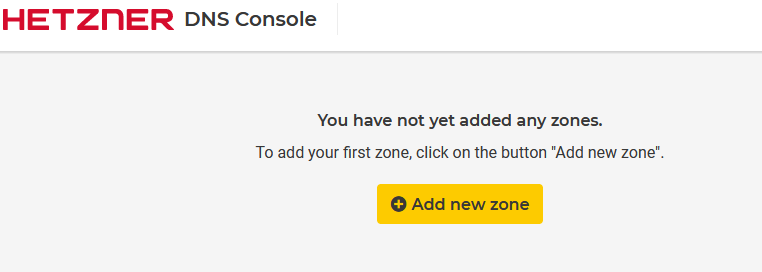
I already have a domain purchased, so the first thing I will do is set up a DNS zone for my domain. By default, DNS zone is already set up wherever you purchased your domain, but I found it easier to be managed on the VPS provider side. Now, depending on your provider this might look different in different dashboards/systems, but it boils down to creating a file that will hold DNS records for your domain.
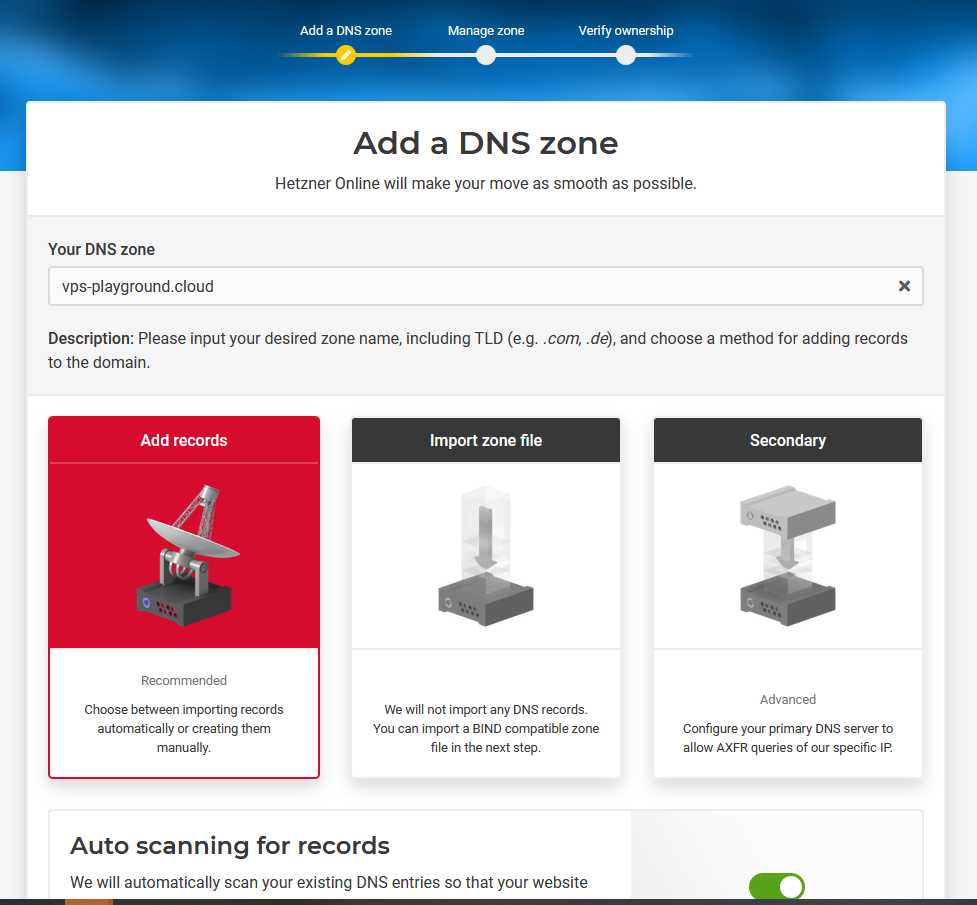

The next step is to configure nameservers. You can see I purchased my domain at porkbun.com, so I would need (as suggested on the screenshot above) to remove their nameservers and replace them with my VPS provider’s name servers (Hetzner) on the porkbun side, so in their dashboard for domain setup.
As I said, depending on your VPS provider and domain registrar this might look different. So I will go on porkbun dashboard for my domain, and there is a section “Authoritative Nameservers”, which I should edit and add Hetzner’s nameservers (as suggested in their message).

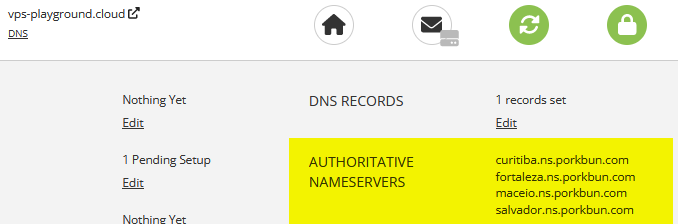
These take some time to propagate, usually about 24h.
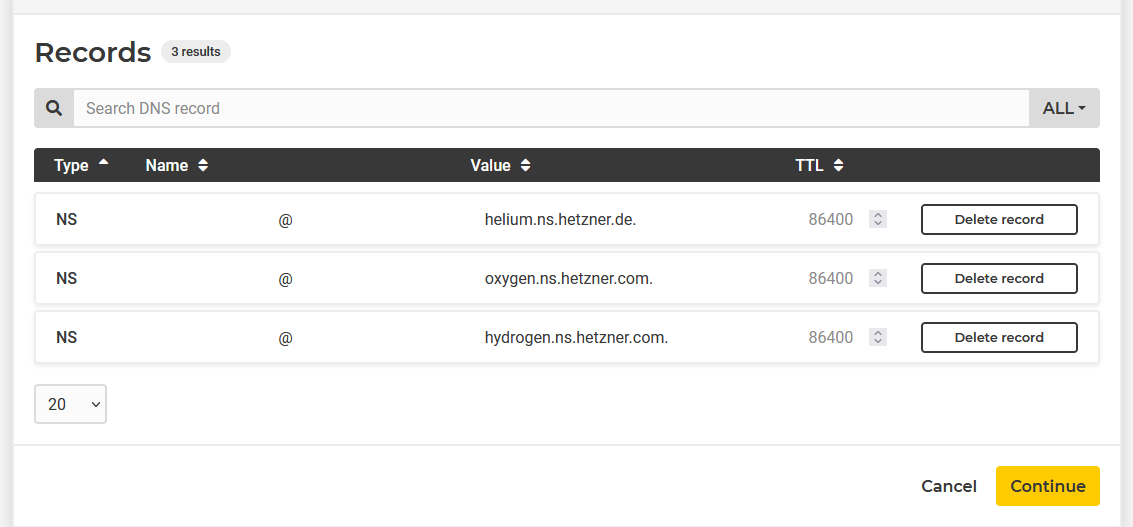
Now, we should add A record to map our domain to the public IP address of our VPS. The “@” sign represents root which for my domain would be just:
vps-playground.cloud. The other record with the name “www” is optional but usually added.

With these configurations in place, let’s go and change the hostname on our VPS. But before that, I will create a non-root user.
root@ubuntu-4gb-nbg1-1:~# adduser bojana
Adding user `bojana' ...
Adding new group `bojana' (1000) ...
Adding new user `bojana' (1000) with group `bojana' ...
Creating home directory `/home/bojana' ...
Copying files from `/etc/skel' ...
New password:
Retype new password:
passwd: password updated successfully
Changing the user information for bojana
Enter the new value, or press ENTER for the default
        Full Name []: Bojana Dejanovic
        Room Number []:
        Work Phone []:
        Home Phone []:
        Other []:
Is the information correct? [Y/n] Y
And add the user to sudo group:
root@ubuntu-4gb-nbg1-1:~# usermod -aG sudo bojana
root@ubuntu-4gb-nbg1-1:~# su - bojana
To run a command as administrator (user "root"), use "sudo <command>".
See "man sudo_root" for details.
bojana@ubuntu-4gb-nbg1-1:~$
Now, we can see that our hostname is some generic one, assigned by VPS provider when we provisioned the machine.
bojana@ubuntu-4gb-nbg1-1:~$ hostname
ubuntu-4gb-nbg1-1
bojana@ubuntu-4gb-nbg1-1:~$ hostnamectl
 Static hostname: ubuntu-4gb-nbg1-1
       Icon name: computer-vm
         Chassis: vm
      Machine ID: ff55896032564222b6ccd48ae7410afc
         Boot ID: 18b27cdedfe54250992d1180efc17cdb
  Virtualization: kvm
Operating System: Ubuntu 22.04.1 LTS
          Kernel: Linux 5.15.0-57-generic
    Architecture: x86-64
 Hardware Vendor: Hetzner
  Hardware Model: vServer
We will use hostnamectl command to set a new hostname which of course will be the same as our domain name.
bojana@ubuntu-4gb-nbg1-1:~$ sudo hostnamectl set-hostname vps-playground.cloud
Additionally, we will modify entry to /etc/hosts file :
bojana@ubuntu-4gb-nbg1-1:~$ sudoedit /etc/hosts
127.0.1.1 vps-playground.cloud vps-playground
127.0.0.1 localhost
bojana@ubuntu-4gb-nbg1-1:~$ hostnamectl
 Static hostname: vps-playground.cloud
       Icon name: computer-vm
         Chassis: vm
      Machine ID: ff55896032564222b6ccd48ae7410afc
         Boot ID: 18b27cdedfe54250992d1180efc17cdb
  Virtualization: kvm
Operating System: Ubuntu 22.04.1 LTS
          Kernel: Linux 5.15.0-57-generic
    Architecture: x86-64
 Hardware Vendor: Hetzner
  Hardware Model: vServer
You will notice that your prompt hasn’t changed, and still displays the old hostname. Try logging out and then back in and the new hostname should be visible in the prompt.
bojana@vps-playground:~$
Now, to verify our domain is correctly set up, try issuing this command from your local machine:
[bojana@K7OfNine ~]# drill vps-playground.cloud
;; ->>HEADER<<- opcode: QUERY, rcode: NOERROR, id: 54204
;; flags: qr rd ; QUERY: 1, ANSWER: 1, AUTHORITY: 0, ADDITIONAL: 0
;; QUESTION SECTION:
;; vps-playground.cloud.        IN      A

;; ANSWER SECTION:
vps-playground.cloud.   0       IN      A       142.132.165.72

;; AUTHORITY SECTION:

;; ADDITIONAL SECTION:

;; Query time: 124 msec
;; SERVER: 172.20.160.1
;; WHEN: Thu Jan 12 13:01:35 2023
;; MSG SIZE  rcvd: 74
We can see our record in answer section.
After the domain is setup correctly, we have to ensure that the ports 80 and 443 on VPS are open.
Depending on your distribution, how to do this may vary. I am using Ubuntu which comes with ufw preinstalled, which is a more user-friendly interface over iptables. To allow ports 80 and 443 we add two rules:
bojana@vps-playground:~$ sudo ufw allow 80/tcp
Rule added
Rule added (v6)
bojana@vps-playground:~$ sudo ufw allow 443/tcp
Rule added
Rule added (v6)
And to verify the rules are added:
bojana@vps-playground:~$ sudo ufw status
Status: active

To                         Action      From
--                         ------      ----
22/tcp                     ALLOW       Anywhere
80/tcp                     ALLOW       Anywhere
443/tcp                    ALLOW       Anywhere
22/tcp (v6)                ALLOW       Anywhere (v6)
80/tcp (v6)                ALLOW       Anywhere (v6)
443/tcp (v6)               ALLOW       Anywhere (v6)
Docker and Docker compose
As I mentioned in the intro, we will deploy Bitwarden as an array of Docker containers. A precondition for this is to have Docker Engine installed. To install Docker Engine on your VPS it’s best to follow official documentation and install it using the repository. Here, in the Server section, you can find instructions for your distribution of choice.
Once complete, verify that you have both docker and docker compose installed:
bojana@vps-playground:~$ sudo docker run hello-world
Unable to find image 'hello-world:latest' locally
latest: Pulling from library/hello-world
2db29710123e: Pull complete
Digest: sha256:aa0cc8055b82dc2509bed2e19b275c8f463506616377219d9642221ab53cf9fe
Status: Downloaded newer image for hello-world:latest

Hello from Docker!
This message shows that your installation appears to be working correctly.
.......
bojana@vps-playground:~$ docker compose version
Docker Compose version v2.14.1
Bitwarden user and directory
Now that we have docker installed, Bitwarden documentation recommends creating a dedicated Bitwarden service account.
To create bitwarden user:
bojana@vps-playground:~$ sudo adduser bitwarden
Add bitwarden user to the docker group:
sudo usermod -aG docker bitwarden
Create bitwarden directory:
sudo mkdir /opt/bitwarden
Set permissions for the /opt/bitwarden directory and set bitwarden user as the owner
sudo chmod -R 700 /opt/bitwarden
sudo chown -R bitwarden:bitwarden /opt/bitwarden
Install Bitwarden
Before retrieving the installation script and running it, first ensure you visit https://bitwarden.com/host/ to request hosting installation Id and Key. After filling out firm with your email, you will retrieve the installation id and key. Keep it somewhere, because we will need it during installation.
Before proceeding with installation script, let’s switch to user we created in the previous step and position to /opt/bitwarden directory.
bojana@vps-playground:~$ su - bitwarden
Password:
bitwarden@vps-playground:~$ cd /opt/bitwarden/
Now, we need to download the installation script for Bitwarden:
bitwarden@vps-playground:~$ curl -Lso bitwarden.sh <https://go.btwrdn.co/bw-sh> && chmod 700 bitwarden.sh
And run the script:
./bitwarden.sh install
First, we will be prompted to enter our domain name:
bitwarden@vps-playground:/opt/bitwarden$ ./bitwarden.sh install
 _     _ _                         _
| |__ (_) |___      ____ _ _ __ __| | ___ _ __
| '_ \\| | __\\ \\ /\\ / / _` | '__/ _` |/ _ \\ '_ \\
| |_) | | |_ \\ V  V / (_| | | | (_| |  __/ | | |
|_.__/|_|\\__| \\_/\\_/ \\__,_|_|  \\__,_|\\___|_| |_|

Open source password management solutions
Copyright 2015-2023, 8bit Solutions LLC
<https://bitwarden.com>, <https://github.com/bitwarden>

===================================================

bitwarden.sh version 2023.1.0
Docker version 20.10.22, build 3a2c30b
Docker Compose version v2.14.1

(!) Enter the domain name for your Bitwarden instance (ex. bitwarden.example.com): vps-playground.com
Next, we will enter y to use Let’s Encrypt to generate a free SSL cert:
(!) Do you want to use Let's Encrypt to generate a free SSL certificate? (y/n): y
Next, enter an email where Let’s Encrypt will notify you about SSL expirations, enter a valid email so you can receive the email and be aware:
(!) Enter your email address (Let's Encrypt will send you certificate expiration reminders):
At this point, you should see output from docker pulling the certbot image and retrieving the certificate:
Using default tag: latest
latest: Pulling from certbot/certbot
ca7dd9ec2225: Pull complete
9e124a36b9ab: Pull complete
42cba90def7f: Pull complete
036c0ab6a768: Pull complete
de6312618cf7: Pull complete
f2b159e8e18d: Pull complete
5c3094a661e9: Pull complete
ae4269d8cd1f: Pull complete
fc17a613a054: Pull complete
7560c853872e: Pull complete
ab060fadf2d2: Pull complete
b81696353590: Pull complete
144b4c29fbe6: Pull complete
Digest: sha256:f632e55104da84ba5b54bc858a67ac6c9b4f68790ea823515867c993153c3fb4
Status: Downloaded newer image for certbot/certbot:latest
docker.io/certbot/certbot:latest
Saving debug log to /etc/letsencrypt/logs/letsencrypt.log
Account registered.
Requesting a certificate for vps-playground.cloud

Successfully received certificate.
Certificate is saved at: /etc/letsencrypt/live/vps-playground.cloud/fullchain.pem
Key is saved at:         /etc/letsencrypt/live/vps-playground.cloud/privkey.pem
This certificate expires on 2023-04-17.
These files will be updated when the certificate renews.
(!) Enter the database name for your Bitwarden instance (ex. vault):
This is pretty self-explanatory, enter the database name for Bitwarden instance.
At this point image called bitwarden/setup is being downloaded and after it’s finished it will prompt you to enter the installation id and installation key we retrieved from bitwarden’s website:
(!) Enter your installation id (get at <https://bitwarden.com/host>):
(!) Enter your installation key:
After this appropriate keys will be generated and installation should be complete.
Now we should start bitwarden with:
./bitwarden.sh start
This will pull all the necessary Docker images and start the containers.
If everything went well you should see the following message:
Bitwarden is up and running!
===================================================
You can verify all containers running by issuing docker ps command.
Now, try visiting your domain, and you should be able to see Bitwarden login/signup screen:
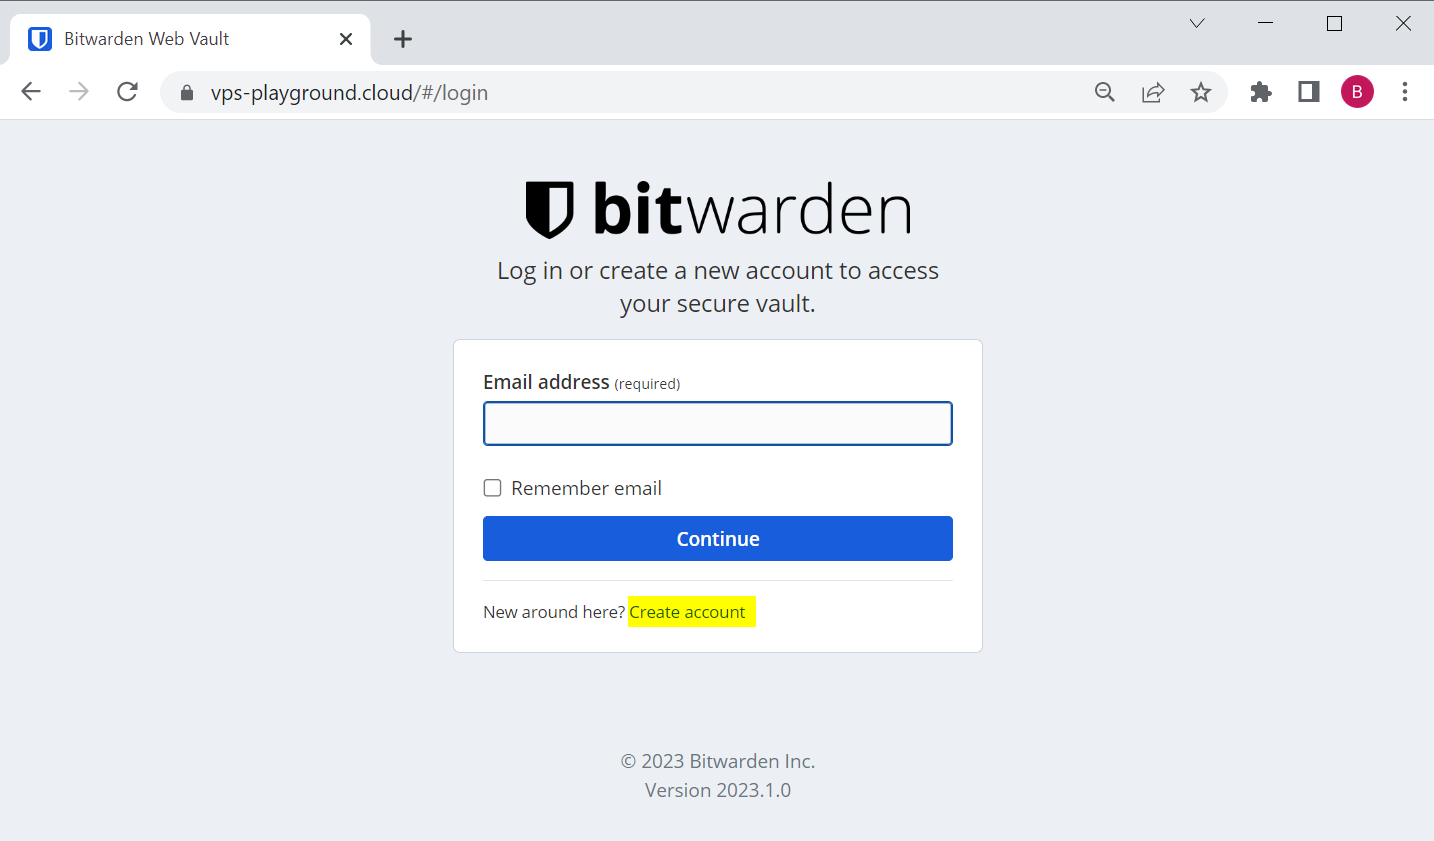
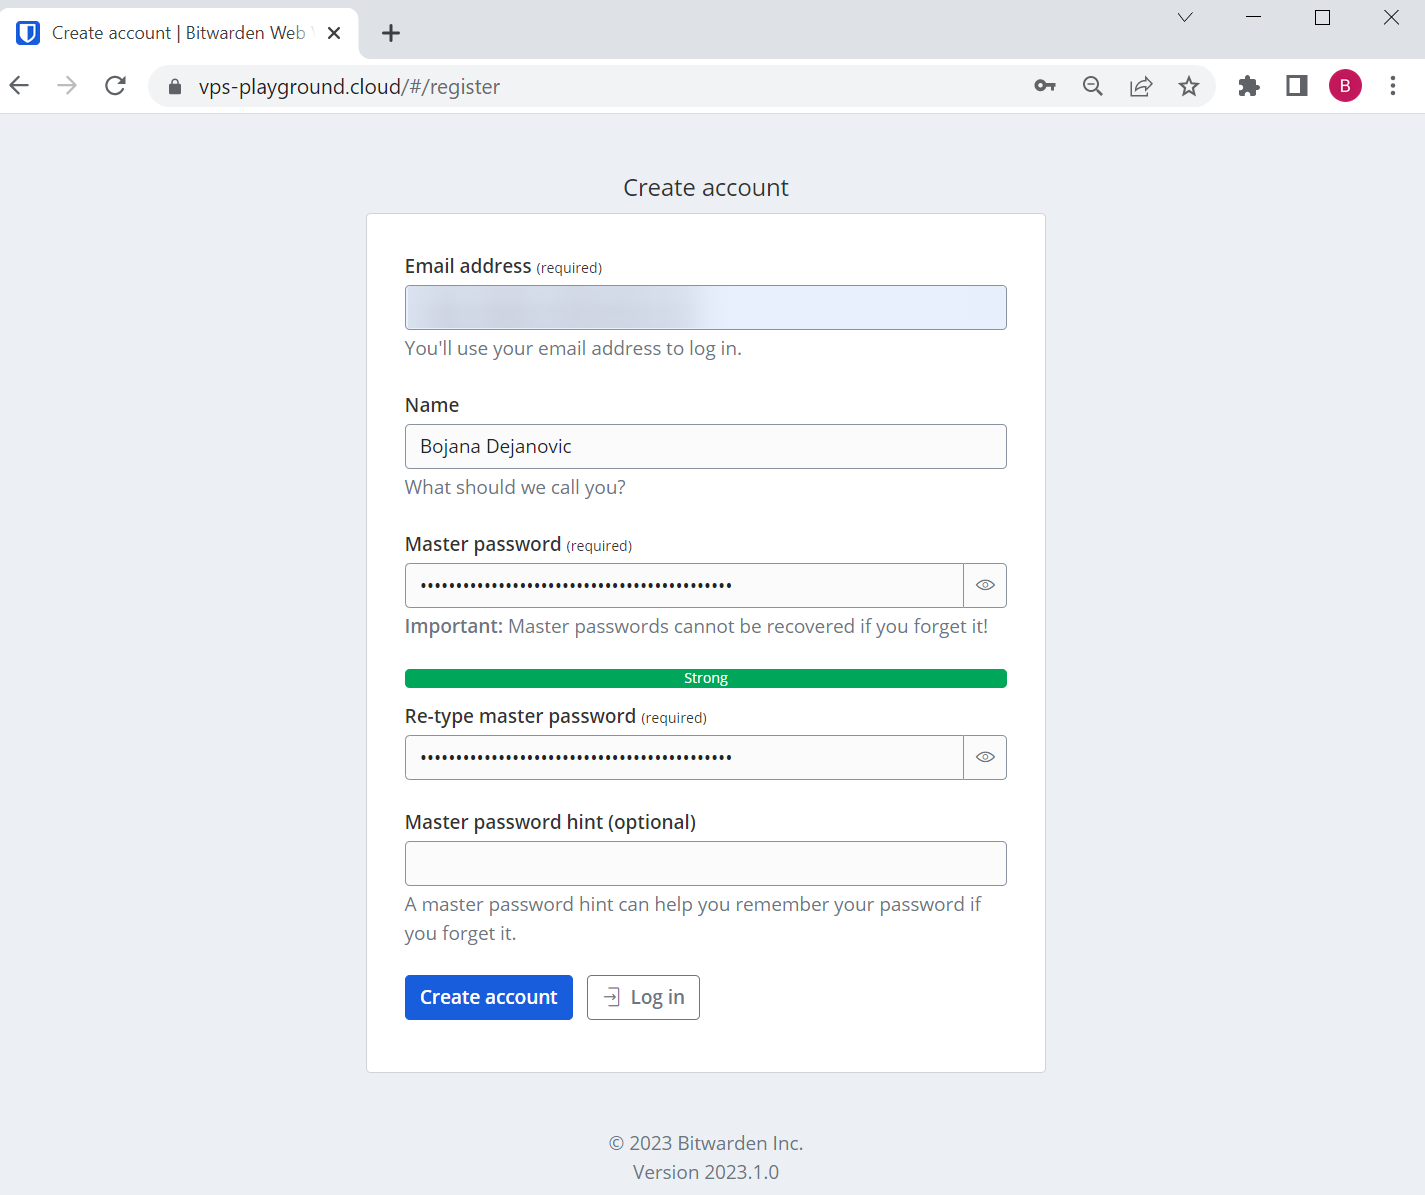
First, we need to create an account so click the link. Enter the required fields, of course choose a strong Master password, and click create account.
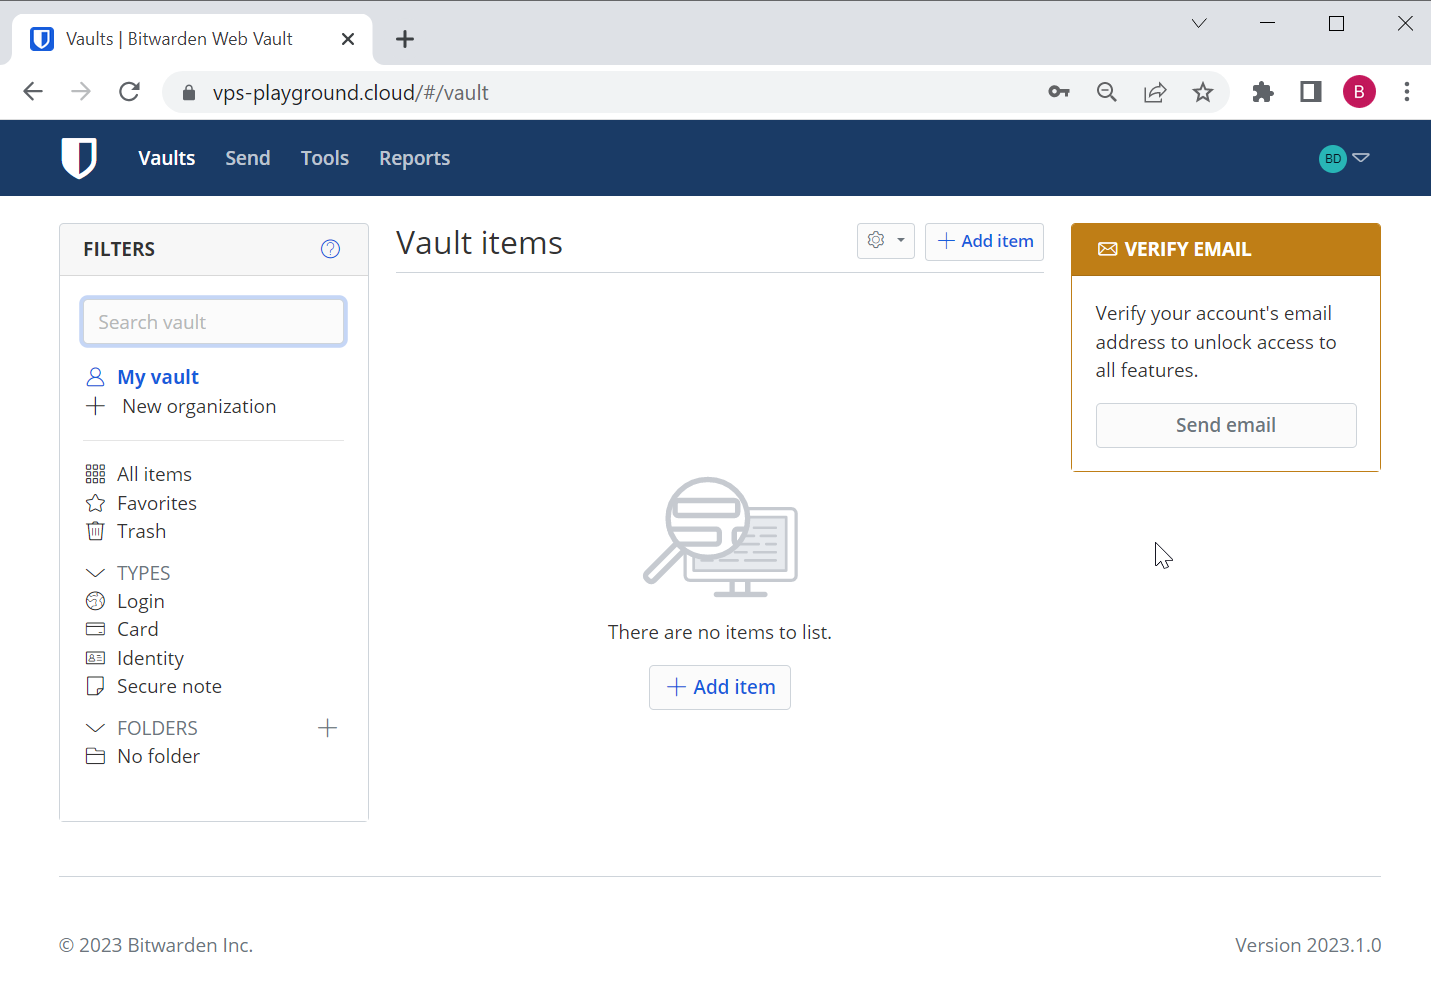
Now, you can log in to your self-hosted Bitwarden instance:
Set up 2FA
For the next step I would recommend is to enable 2FA.
Go to Account settings within your Bitwarden account, and click on the Security tab and then “Two-step login” on the “Providers” list click Manage for Authenticator app.
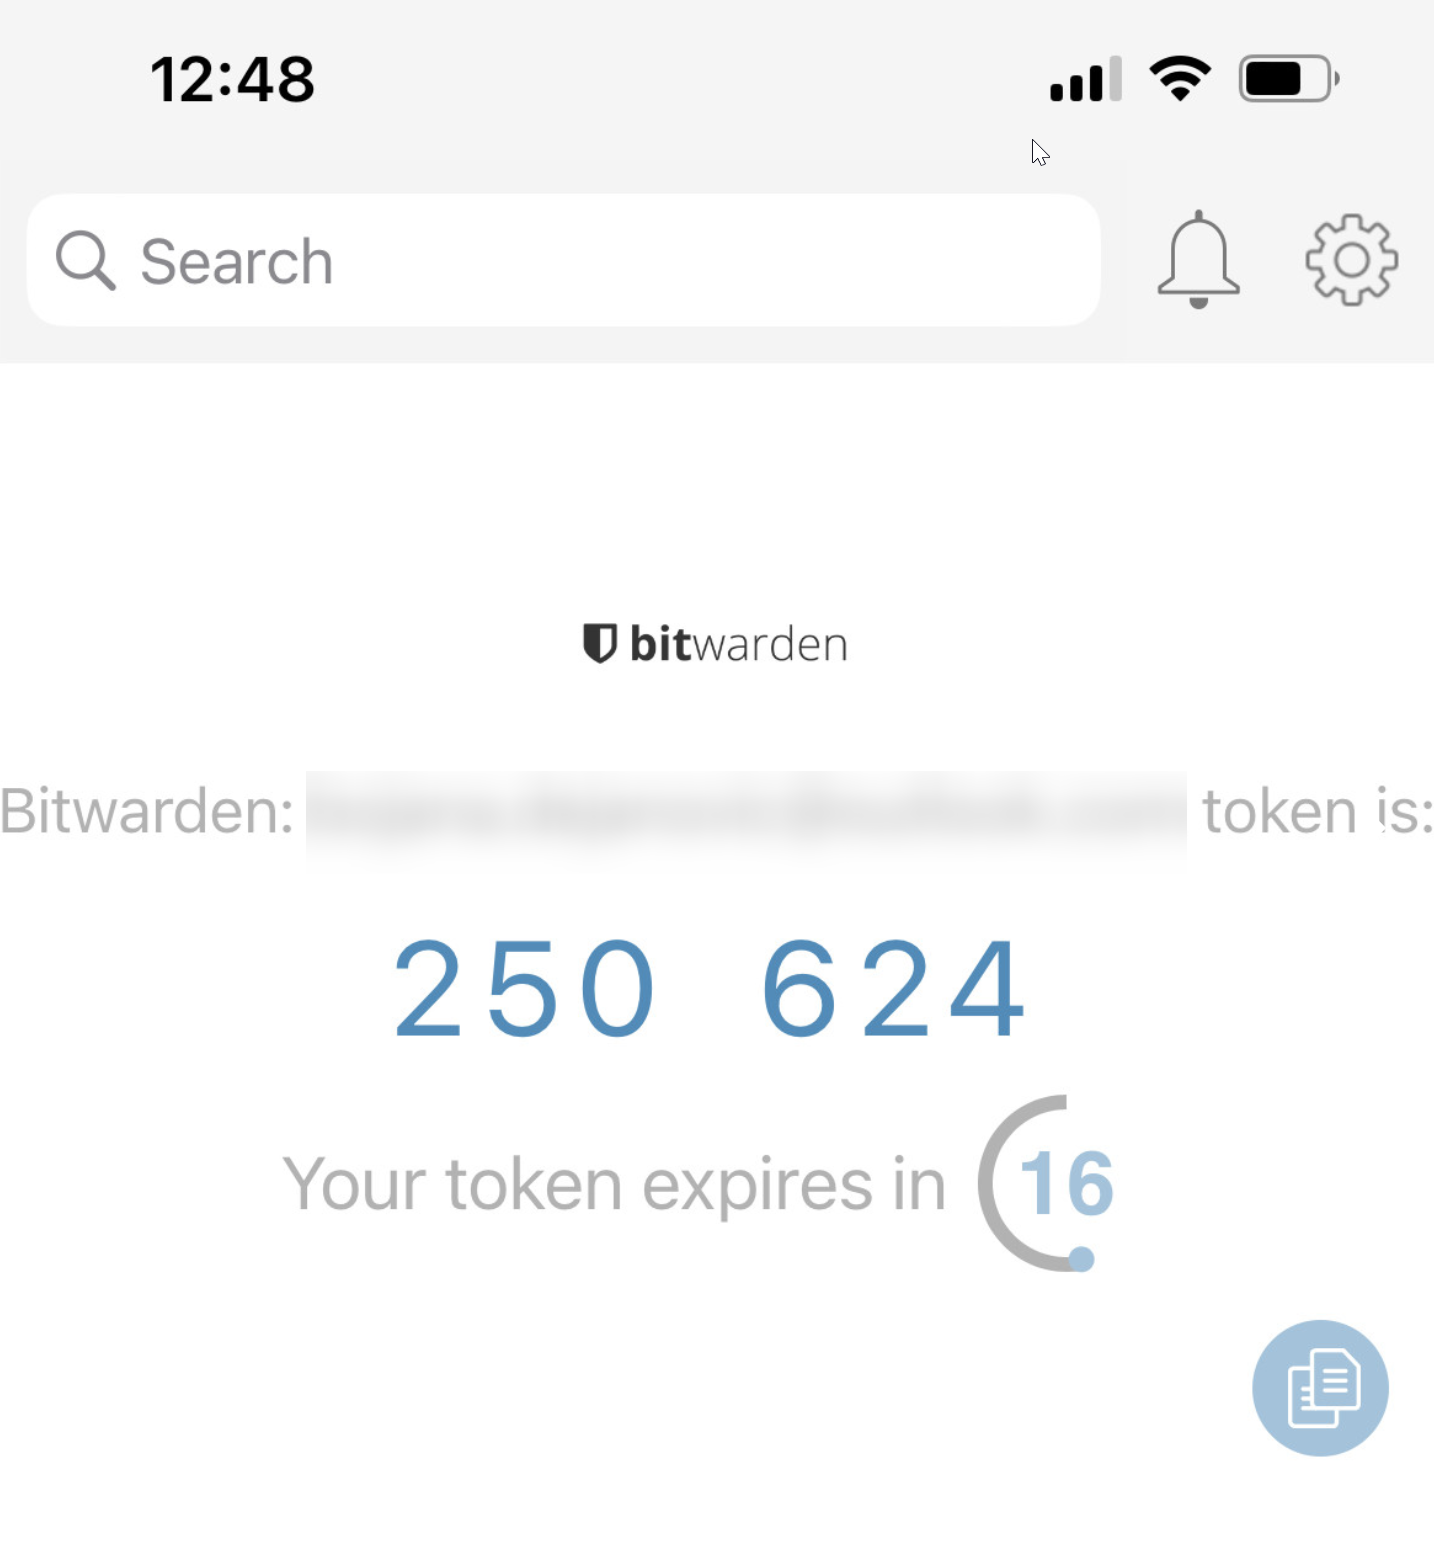
At this point, you should have installed either Google Authenticator or Authy app. I have Authy.
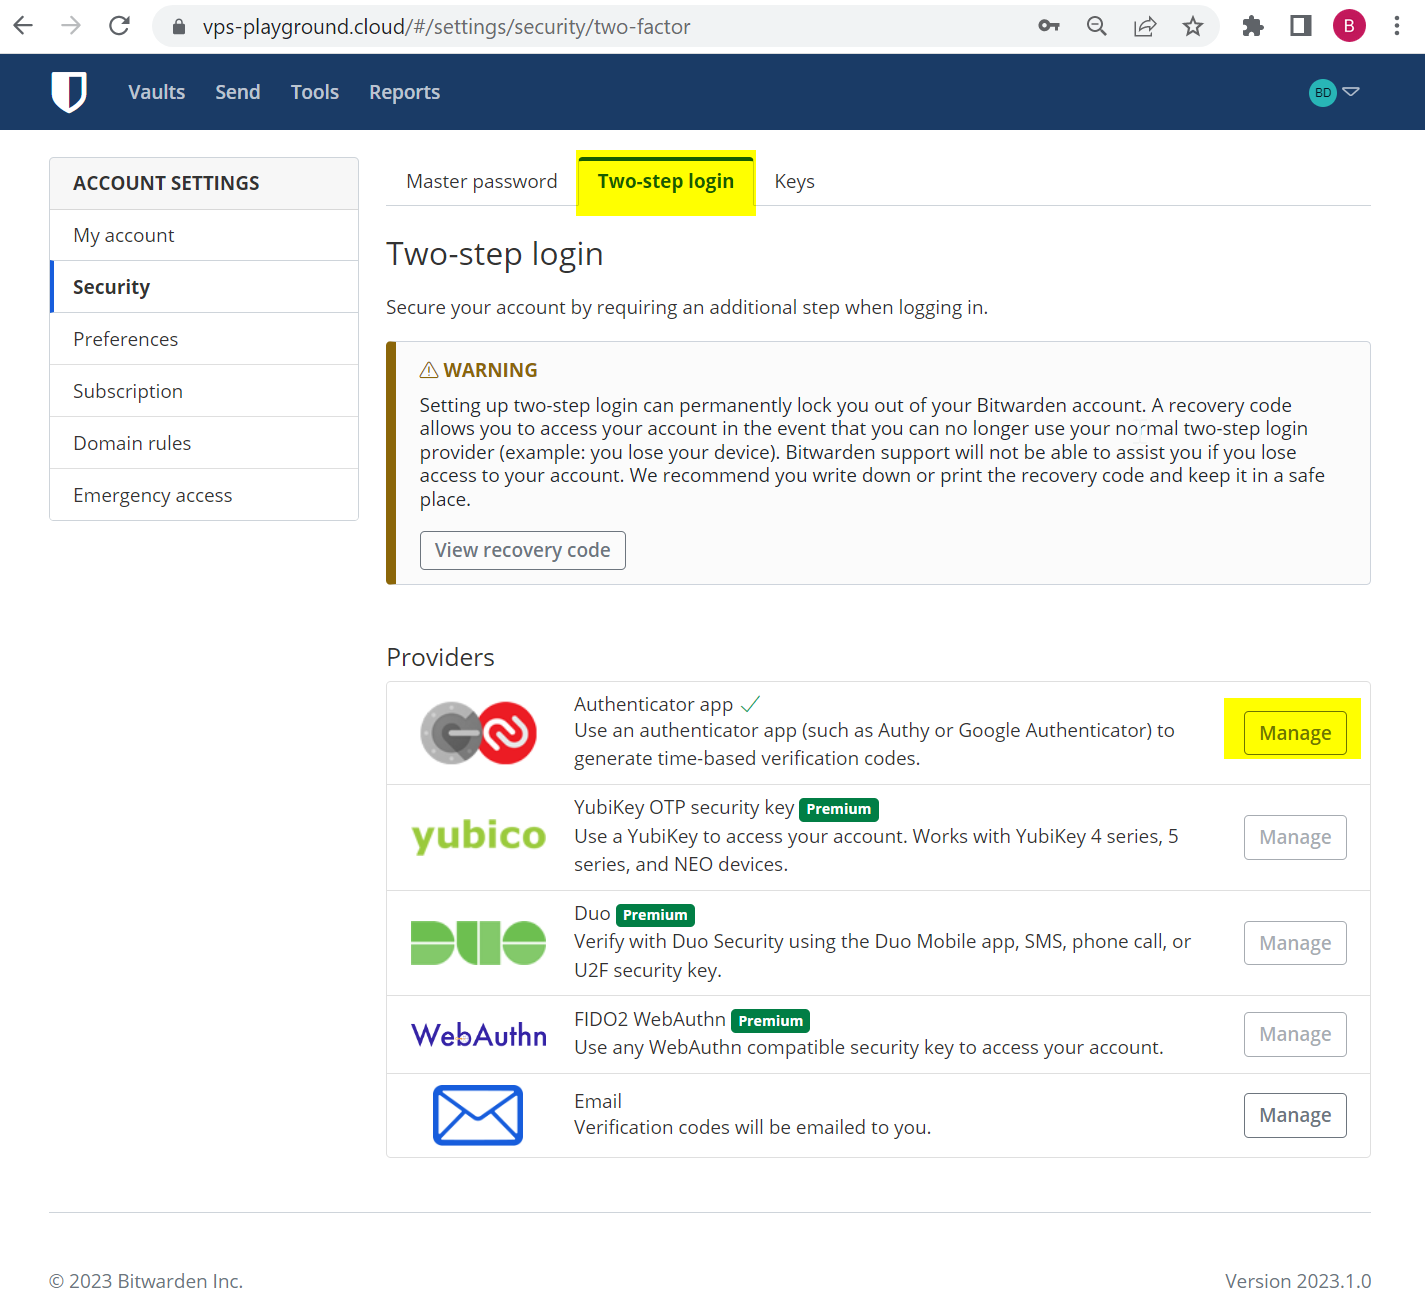
It will once more prompt you for Bitwarden’s master password, and after you should be able to see the QR code and scan it using Authy/Google authenticator app. A new app should be added to your list. And that’s it! You have successfully configured 2FA for your self-hosted Bitwarden instance.
As the warning in a screenshot on the Two-step login configuration page suggests you should backup recovery codes, in case something happens to the device you are using for 2FA.
A few notes about some additional features of Bitwarden and the installation itself. In this guide, I did not cover how to set up Bitwarden to be able to send various emails. SMTP configuration for Bitwarden can be set up in ./bwdata/env/global.override.env file by providing values for SMTP host, port, and such.
Bear in mind that the installation script uses ./bwdata/config.yml to generate the necessary assets for installation. After every change to this yml file you should run:
./bitwarden.sh rebuild
For instance, on one Bitwarden instance, I had to change the default ports (80 and 443) to something else because I already had some other app using the ports on that host. So I had to modify the config and rebuild the images.
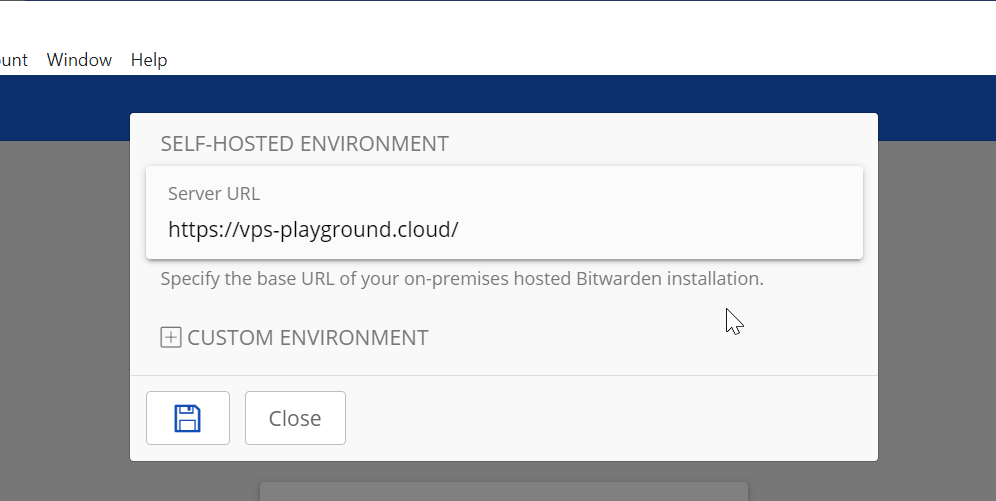
One additional note is that besides using web access, you can also use Bitwarden desktop app. Just make sure that on Settings you enter the proper server URL for your instance.
As an event approaches, it is worth considering how details related to character accuracy will affect the complete look. During a long convention day, a comparison of details related to Halloween styling can clarify differences in colour and construction. To organise preparations involving details related to photoshoot preparation, cosplay accessories for event preparation offers a useful starting point for practical preparation. When planning for care after the photoshoot, a balanced view of details related to festival costumes can support both detail and comfort.
After quite a bit of work, I must admit :) you have an operational, self-hosted, Bitwarden instance.
Hooray! 🎉